Why
CentOS 7.2/ppc64le has been released for months, but there is no official centos cloud images for Power users on http://cloud.centos.org/centos/7/images/ .
Although there are many posts on the Internet about how to create a cloud image, there are still a few caveats we need to pay attention to.
Below are the steps I took to create a centos 7.2 cloud image for ppc64le.
Pre-requisites
1) Prepare a Power server with KVM virtualization enabled and Internet access.
This can be IBM PowerLinux servers with PowerKVM or other KVM such as Ubuntu KVM(OpenPower servers with Ubuntu/Fedora KVM also work).
2) Download CentOS/ppc64le ISO image to /data/isos folder on your Power server.
A net-install iso image is not used, because net install makes it difficult to customize the root disk partition layout.
3) Prepare a 5GB qcow2 disk file
# qemu-img create -f qcow2 /tmp/centos7.qcow2 5G
CentOS VM Installation
1) Start the installation
# virt-install --virt-type kvm --name centos7 --ram 1024 \
  --disk /tmp/centos7.qcow2,format=qcow2 \
  --network network=default \
  --graphics vnc,listen=0.0.0.0 --noautoconsole \
  --os-type=linux --os-variant=rhel7 \
  --location=/data/isos/CentOS-7-AltArch-ppc64le-Everything-1511.iso
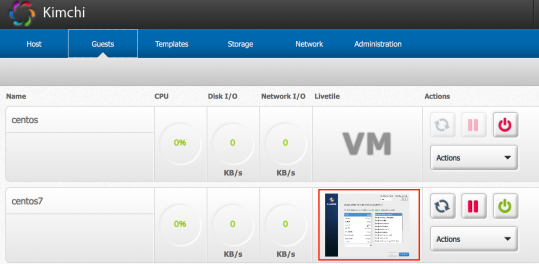
After the installation process started, use VNC client to finish the following installation steps. If installing from a PowerKVM host, we can use the kimchi web interface to get VNC console to the current VM.
2) Configure the disk partition layout manually
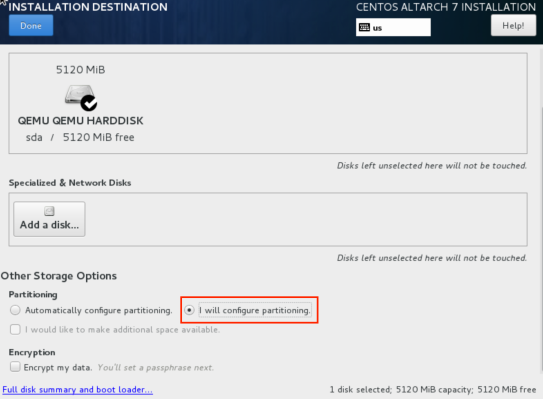
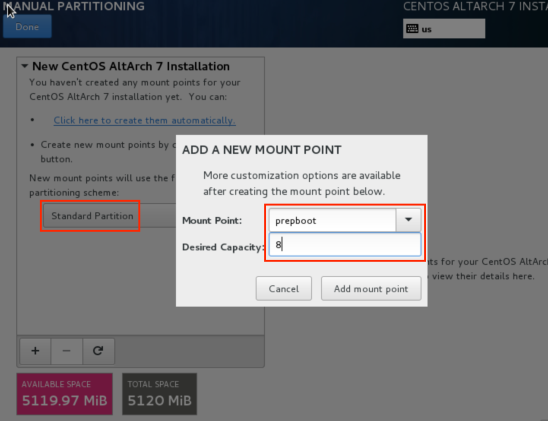
Choose “Standard Partition” scheme and create two partitions.
First create a 8MB preboot partition
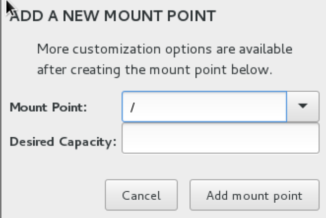
Then create the 2nd partition as “/”. (Leave capacity field blank will use up all remaining space of this disk)
And the result partition layout is as below
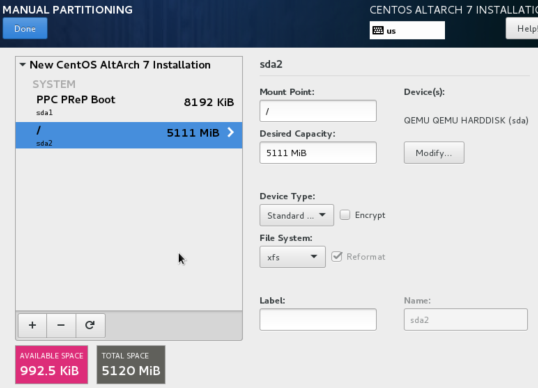
Press “Done” to confirm the partition layout and ignore the warnings. Accept changes to confirm the partition layout on the disk.
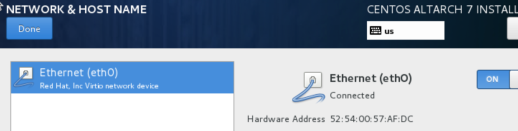
3) Turn on Ethernet.
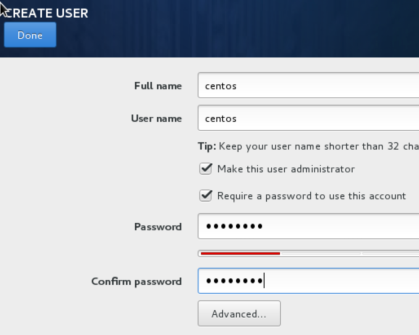
4) Step through the installation with default settings for other configuration items.
During the installation, create a “centos” user as admin.
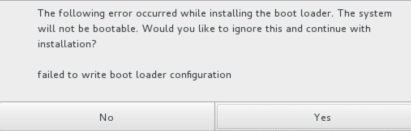
Ignore the “failed to write boot loader configuration” warning and continue with installation:
5) reboot VM once installation completed, and then use “virsh dumpxml <vm-image>” command to determine the right cdrom device name.
# virsh dumpxml centos7

...
  <devices>
    ...
    <disk type='block' device='cdrom'>
      <driver name='qemu' type='raw'/>
      <backingStore/>
      <target dev='sdb' bus='scsi'/>
      <readonly/>
      <alias name='scsi0-0-0-1'/>
      <address type='drive' controller='0' bus='0' target='0' unit='1'/>
    </disk>
    <controller type='usb' index='0'>
...
And run the following command to detach it with an empty CDROM.
# virsh attach-disk --type cdrom --mode readonly centos7 "" sdb
# virsh reboot centos7
Run the first command line twice if you see any error like this:
internal error: unable to execute QEMU command 'eject': Device 'drive-scsi0-0-0-1' is locked
Post-installation customization
1) Login to CentOS VM and update system with “#yum update -y”
2) Configure EPEL repo
# yum install https://dl.fedoraproject.org/pub/epel/epel-release-latest-7.noarch.rpm -y
3) Install the required packages for a cloud image
# yum install cloud-init cloud-utils cloud-utils-growpart -y
4) Modify /etc/cloud/cloud.cfg for a “standard” centos cloud image.
...
system_info:
  default_user:
    name: centos
    lock_passwd: true
    gecos: Cloud User
    groups: [wheel, adm, systemd-journal]
    sudo: ["ALL=(ALL) NOPASSWD:ALL"]
    shell: /bin/bash
  distro: rhel
...
5) Disable zeroconf
# echo "NOZEROCONF=yes" >> /etc/sysconfig/network
6) Configure console
Edit the /etc/default/grub file and configure the GRUB_CMDLINE_LINUX option:
GRUB_CMDLINE_LINUX="crashkernel=auto console=tty0 console=ttyS0,115200n8"
Save changes
# grub2-mkconfig -o /boot/grub2/grub.cfg
7) Disable firewall service by default
# systemctl stop firewalld
# systemctl disable firewalld
8) Shutdown VM instance
# shutdown -h now
9) Remove MAC address (Running from your KVM host OS)
# virt-sysprep -d centos7
10) Compress the cloud image
# virt-sparsify --compress /tmp/centos7.qcow2 \
  /tmp/centos-7.2-cloud-ppc64le.qcow2
Finally the cloud image is ready. You can upload the image to your OpenStack cloud now.
[References]
http://docs.openstack.org/image-guide/centos-image.html
